How to Design a Home Gym with Rubber Flooring: Tips from the Pros
April 9, 2025Creating a home gym is one of the best investments you can make in your lifestyle and well-being. Whether you’re into weight training, HIIT workouts, yoga, or spinning, the right space can motivate you to stay consistent and safe. And at the heart of any great home gym lies one critical feature: the flooring.
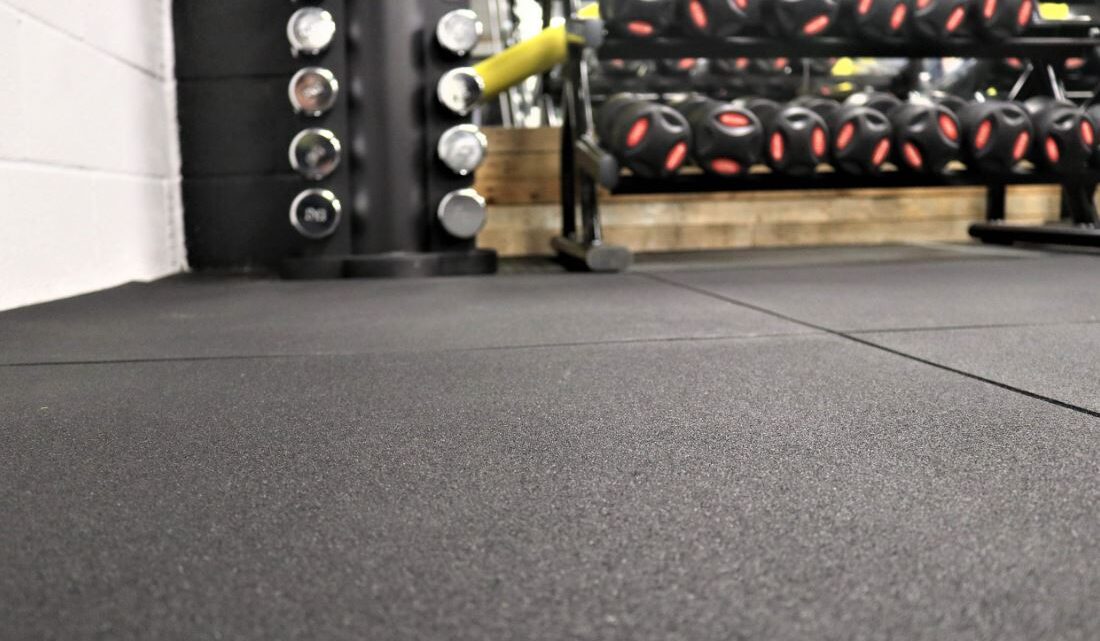
Among all flooring options, Rubber flooring Dubai stands out as the top choice for home gyms. It’s durable, shock-absorbent, slip-resistant, and easy to maintain — everything you need to support intense workouts and heavy equipment. But how do you choose and design the perfect rubber flooring setup?
Here’s a pro-approved guide to help you design your dream home gym with rubber flooring — stylish, functional, and built to last.
Why Rubber Flooring Is Perfect for Home Gyms
Before diving into design tips, let’s quickly understand why rubber flooring is the go-to for gym spaces:
Shock Absorption: Great for reducing impact on joints during workouts and protecting your subfloor from weights and equipment.
Durability: Resistant to wear and tear, heavy foot traffic, and heavy machinery.
Slip Resistance: Minimizes the risk of slipping, even during sweaty sessions.
Noise Reduction: Absorbs sound from dropped weights or high-impact movements.
Easy Maintenance: A quick sweep and mop are often enough to keep it clean.
Step 1: Assess Your Workout Needs
Start by considering what kind of workouts you’ll be doing. This helps determine the right thickness, density, and finish of rubber flooring:
Weightlifting or Powerlifting? Go for high-density rubber tiles or rolls, at least 8mm to 15mm thick.
Cardio and HIIT training? Thinner mats (6–8mm) with non-slip surfaces are ideal.
Yoga or Stretching areas? Use softer rubber flooring or mix with foam tiles for extra comfort.
Multi-use space? Combine zones using different finishes or colors.
Step 2: Choose Between Rolls, Tiles, or Mats
Rubber flooring comes in three main forms. Here’s how to choose:
Rubber Rolls
Best for larger spaces. Seamless, durable, and ideal for full-floor coverage. Rolls are also more affordable per square meter.
Interlocking Rubber Tiles
Great for DIY installation. These puzzle-style tiles are easy to replace, customizable in layout, and perfect for medium-sized or oddly shaped rooms.
Rubber Mats
Perfect for specific zones — like under your treadmill or weight bench. Mats are portable and easy to clean but not suited for full-room coverage.
Pro Tip: Mix and match — use rolls for the main area and mats or tiles for designated workout zones.
Step 3: Pick the Right Thickness
Here’s a general rule of thumb:
4mm–6mm: Light workouts, stretching, yoga.
8mm–10mm: General fitness, cardio, kettlebells, light weightlifting.
12mm+: Heavy lifting, CrossFit, or gym machines.
For extra impact protection, consider adding a subfloor underlay or using double-layered rubber tiles.
Step 4: Choose Color and Style
Gone are the days when rubber flooring only came in basic black. In 2025, you have a variety of stylish options, including:
Speckled Designs: Black with colored flecks to add interest and hide dirt.
Solid Colors: Grey, blue, or red for bold aesthetics.
Wood-Look Rubber: For those wanting a more sophisticated home interior vibe.
Zoned Designs: Use different colored tiles to create clear zones for cardio, weights, and stretching.
Pro Tip: Darker colors hide wear and stains better, but lighter colors can make small spaces feel more open.
Step 5: Ensure Proper Installation
Installation can be DIY-friendly — especially with interlocking tiles — but professional help is recommended for large rubber roll applications. Make sure to:
Level the subfloor before installation.
Use double-sided tape or adhesive if necessary (especially for rolls).
Leave a slight expansion gap around walls if you’re using glue-down options.
Step 6: Add Complementary Features
To elevate your home gym’s functionality and comfort:
Install mirrors: They help with form correction and make the room feel bigger.
Add wall storage: For resistance bands, mats, or dumbbells.
Ventilation or fans: Essential for airflow and temperature control.
Lighting: Go for bright, even lighting for safe workouts.
Sound system: Boost your motivation with built-in speakers or wireless setups.
Step 7: Maintenance Tips
Rubber flooring is low maintenance, but a few habits will keep it looking and performing its best:
Daily sweep or vacuum to remove dust and debris.
Weekly mop using a mild detergent (avoid harsh chemicals).
Avoid dragging heavy equipment — always lift and move to prevent dents or tears.
Final Thoughts
Designing your home gym with rubber flooring Dubai is one of the smartest moves you can make for a safe, efficient, and motivating workout space. It’s a long-term investment that not only protects your equipment and floors but also supports your fitness journey every step of the way.
Whether you’re lifting heavy, flowing through yoga poses, or just getting started with home fitness, rubber flooring offers the durability, style, and comfort you need — all while looking sleek and professional.


